Cookies For Santa Box - Photo Tutorial

Materials You Will Need:
1. Cardstock or Matte Photo Paper
( I prefer LD Heavy Coated Inkjet Paper
it's inexpensive and prints in vivid colors. )
2. Scissors
3. Double Sided Tape ( I prefer Scor-Pal )
4. Christmas Cookies
5. Access to a printer.
If you don't have a printer most Public Libraries will allow you to bring your own cardstock or matte photo paper and they usually charge a nominal fee. You can always
call them in advance to find out their pricing.
The gorgeous digital backgrounds are by
The DigiRainbow on Etsy.
Graphics used to create this printable are
Copyright
© PrimsyDoodle Designs - Lisa Craig Personal Use Only.
Step One:
Open the printable cookie box PDF
Click here to open printable
PDF.
Step Two:
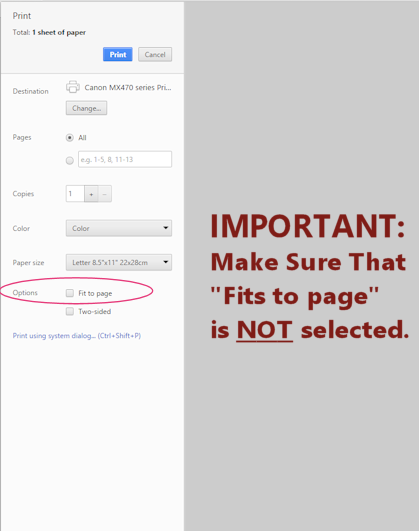
Before printing make sure that the “fit to page” selection is NOT selected so they print out the correct size.
Step Three:
Load your printer with your cardstock or matte photo paper and print the box.

Step Four:
Cut the box out along the white edges. See preview image below for an example of creating tabs on the side. I have found it helps add support to the inside of the box.

Step Five:
Score and fold the white lines on the side of the box and along the bottom. If you don't have a score board it's okay. I made mine without using one. I just folded the sides on the white lines and then waited
until I had the box taped on the sides to fold the bottom. I found it easier to just pinch along the white lines on each side of the bottom and it popped right into place. Push against the inside bottom edge with one hand along where
the white lines are while using your other hand to pinch along the lines on the outside.

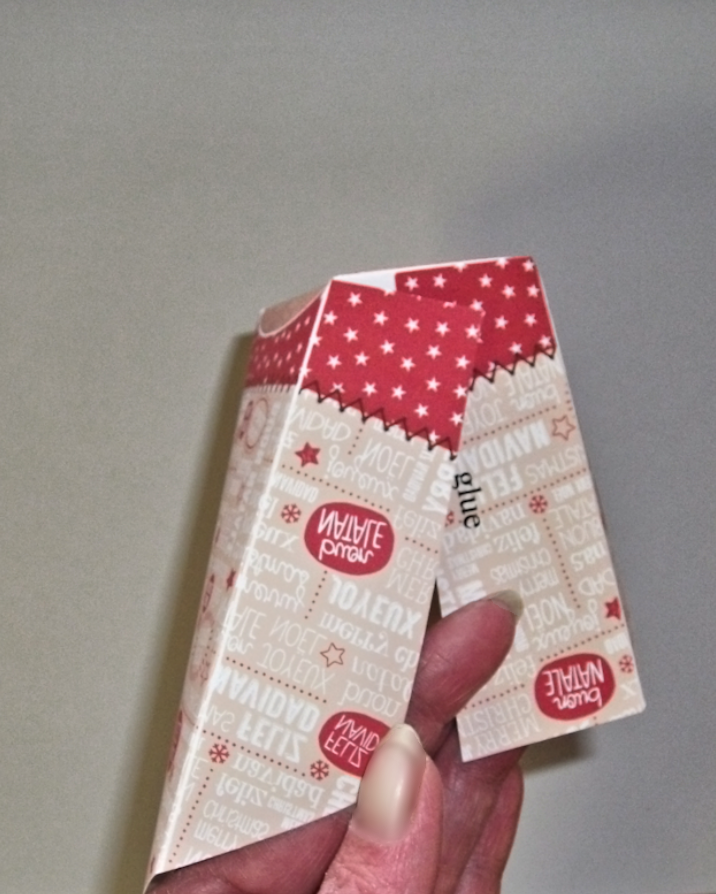
Step Six:
If you are using hot glue you will run a line across the tab that says "glue here" and fold the opposite side flap on top of the glued flap.
If you are using double sided tape you can place it on the inside outer edge of the flap that does not say "glue here". See photo above for an example.
Fold flap without the tape over on to the taped flap and press f
firmly to make sure the tape has adhered to the sides of your box. Repeat this step for the other side.
If you didn't score the bottom white lines this is where you
will pinch along the lines to create that crease on each side. Once that is done your cookie box is ready to fill with Cookies For Santa.
The finished cookie box measures approximately 5 1/2"H x 3 1/2"W x 2.5"D.


